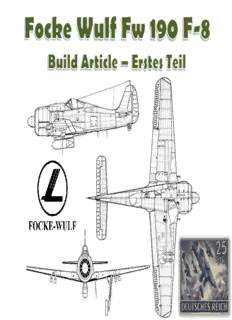
Table Of ContentIn 1937 the Reichsluftfahrtministerium (German Air Ministry) issued a contract to the Focke-Wulf
Flugzeugbau (Focke-Wulf Airplane Company) for a single-engined fighter to supplement the
Messerschmitt Bf 109 then entering service as the standard Luftwaffe day fighter. A team led by
Professor Kurt Tank tendered two proposals for the new fighter: one powered by the same Daimler-
Benz DB 601 liquid-cooled engine used in the Bf 109 and the other by a BMW 139 fourteen-cylinder, air-
cooled, radial engine. With all available DB 601 production allocated to the Bf 109 and the twin-engine
Messerschmitt Bf 110, the Air Ministry selected the radial engine proposal for development, despite a
distinct preference for liquid-cooled powerplants. Designated Fw 190 officially but called Würger
(Butcher Bird) in the field, the new design was the only German fighter of World War II that flew behind
a radial engine. It claimed another notable first as the only fighter aircraft of the war equipped with
electrically-operated landing gear and flaps.
I like the drawings in the squadron books and I’ve have seen a Squadron inspired contest theme in the
past. I therefore have always wanted to build a scheme from their series of books. In this case I want to
model the Fw 190 F-8 as seen on the cover of ‘In Action’ book number 170. I would like to build this in
1/32 scale. I believe Revell makes the F-8 version in 1/32, but I would prefer to start with the Hasegawa
kit. I have it in stock and I know it’s a relatively good kit. Apparently Hasegawa did release a 1/32 F-8
version (limited edition), however it seems to be hard to find now. Fortunately it doesn’t take much to
convert an A-8 to a F-8. You’d be hard pressed to call it a conversion.
*Reproduced without permission. Not intended for distribution.
The F-8 doesn’t have the outer MG 151 cannons so it’s just a matter of filling the hole in the leading
edges. Most F-8’s also had a blown canopy. I will use either a canopy from Hasegawa’s Fw 190 D-9 kit
or try to vacu form a copy. If anyone has a blown canopy that they wouldn’t mind parting with then
please let me know. The plane I’m making did not have the under wing bomb racks in place so that
problem is taken care of as well. The lower wing outer gun access panels will require some minor
modification also. Additionally F-8’s had additional internal armour but this can’t be seen so will not
need reproducing.
*Reproduced without permission. Not intended for distribution.
As mentioned before I’ll be using Hasegawa’s 1/32 Fw 190 A-8 kit. Hasegawa also released the A-5
version, both of these represent the longer fuselage variants. A-0’s to A-4’s had a shorter fuselage. As
far as I’m aware markings for the plane that I’m building are not available in aftermarket decals, so I
intend on painting most of them. Hasegawa has been producing some excellent 1/32 aircraft kits at a
very reasonable cost. Although the interior or other features may not be to the same standard as
recent Tamiya releases, I believe that there isn’t much standing in the way to produce a very nice result.
As usual I’m intending to try a few new things. The biggest thing I’m contemplating is the addition of
rivets. Let’s see if I’m up to it.
I have some objectives in mind with this build.
•Add rivets to the fuselage and wings.
•I want the front cowl a slightly different tone than the rest of the paint. Seems quite common on Fw
190’s.
•Minimize aftermarket product use.
•Keep the paint thickness to a minimum.
•If I’m ambitious enough I’ll try to scratch build a SC500 bomb as seen in the picture.
*Reproduced without permission. Not intended for distribution.
Before I start any construction I cleaned up my workbench. Nice and clean for the next disaster!?
Turning your cutting mat over doubles the life.
As is usually the norm construction will begin with the cockpit. The supplied pilot figure is not worth
keeping and will be relegated to the trash. Very few components are supplied to complete the cockpit.
Time to look up some reference and see if anything needs or can be added. At minimum seatbelts are
the one of the key items missing.
The side panels have pins that ensure they are assembled on the correct side. Nice little poke-yoke from
Hasegawa. Once glued on there’s a seam along the tub that isn’t supposed to be there. A little putty
hides it. The seat back is also a little thick. A few swipes of the sanding stick makes it look in scale.
3
1
4
2
*Reproduced without permission. Not intended for distribution.
As mentioned before the seat needs some seatbelts. I usually have a hard time keeping the shackles
glued in place. They come off when I’m manipulating the belts into the seat. I tried something different
this time and drilled holes in the side (actual mounting location) and put 30 gauge wire through it. I
then put the shackle eye onto the wire and bent the ends. Is that too crazy?
1 2 3
Eduard P/E used
Mounting location
*Reproduced without permission. Not intended for distribution.
Description:Flugzeugbau (Focke-Wulf Airplane Company) for a single-engined fighter to supplement . then put the shackle eye onto the wire and bent the ends. The second colour isn't too critical, it just needs to be darker and in the general.

