Table Of Contents
t
n
e
t
n
o
C
01
Introducing Android Robot Hovis Genie
1.1 Hovis Development Background
1.2 Hovis Genie Features
(1) Hovis Lite
(2) Hovis Genie
1.3 Hovis Genie Hardware
(1) Robot body
(2) Face
(3) Hovis Genie specification
1.4 Hovis Genie Software Features
(1) MPSU (DRC-005T), OPSU (DRC-004TO ), MID Side Board
(2) MID - Android
1.5 Running Hovis Genie Application
(1) Main screen
(2) Autonomous operation
(3) Remote Control
(4) Adapting Contents for Robot Service
(5) Purpose & application of the provided software
02
Creating Development Environment
for Android & Robot
2.1 JDK Installation
2.2 Android SDK installation
2.3 Eclipse installation & environment setup
03
Android Robot (Genie) Programming
3.1 HelloGenie Project Creation
3.2 Running HelloGenie Project
3.3 HelloGenie Project Basic Structure
(1) AndroidManifest.xml
(2) MainActivity.java and activity_main.xml
04
Starting Hovis Genie Robot Programming
4.1 Genie Api Demo Project Creation
4.2 Genie Api Demo Application Class
4.3 Creating Base Activity for Robot System
05
Hovis Genie Robot API
(Application Programming Interface)
5.1. Drivetrain Functions
5.2. Navigation Functions
5.3. Sensor Functions
5.4. TTS(Text-to-Speech) Functions
5.5. Sound(Sound effects) Functions
5.6. Multimedia(Audio & Video) Functions
5.7 Motion & Servo Motor Related Functions
5.8 Head LED Controll Related Functions
06
Hovis Genie Examples
6.1. Main Screen
6.2. Drivetrain Control
6.3. Motion Control
6.4. Head LED Control
6.5. TTS Control
6.6. Distance Sensor Control
6.7. Touch Sensor Control
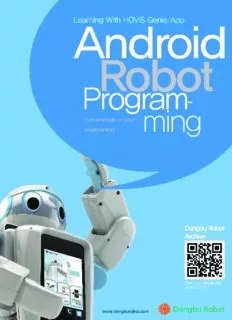
Learning With HOVIS Genie/App Android Robot Programming
01
Introducing Android Robot
Hovis Genie
1.1
HOVIS Development Background
Previously developed service robots were large units incorporating touch screens
made for PCs which users operated from standing positions. These robots were
mostly developed as part of public sector projects for use in public facilities rather
than for use by the consumers. These service robots had limited service contents
and could only be programmed by the supplier (manufacturer). Android robot Hovis
was developed to overcome these limitations and to expand the services provided
by the robot.
The name HOVIS is derived from ‘Home Service’ and as the name implies Hovis
was developed to provide practical services to the consumers. In order for robot to
be of practical use at home, it needs software that is capable of handling various
situations that can arise at home. Hovis Genie uses the same method as the smart
phones to receive software or Apps it requires to perform various tasks required by
the users. Apps or software will be developed and supplied by the engineers and
application developers using the Android platform. Dongbu Robot will supply the
Android robot with Android terminal installed and provide the software (API) and
the programming method to create robot service applications
(1) Hovis Lite
Before describing Hovis Genie in detail, brief description of Hovis Lite is required.
1.2
HOVIS Genie Features
8
CHAPTER 01 - Introducing Android Robot Hovis Genie
Hovis Lite is a humanoid robot with an 8bit controller using ATmega 128
microprocessor. Developed for robot education, Hovis Lite incorporates servo motors,
various sensors, and versatile body. 8bit controller mentioned above called DRC is
the brain of the robot. To control the DRC, motor, and various sensors, Hovis
Lite is supplied with software tool DR-Visual Logic. DR-Visual Logic is a graphic
development language with C language like features such as variable delcaration,
function implementation, and logic formation. Also, to faciliate in creating motion
for this complex16 axis robot, Hovis Lite is also supplied with motion develoment
tool DR-SIM as well. Hovis Genie is based on Hovis Lite with the major differences
being the Omni wheel replacing the legs, external casing, and addition of Android
terminal which is used to control the DRC and various attached sensors.
(2) Hovis Genie
Hovis Genie was developed to provide services at home. Variety of required services
can be performed by Genie by running service applications as an App using the
Android terminal.
9
Learning With HOVIS Genie/App Android Robot Programming
Charging station
receiver충전스테이
Charging terminal
Charging terminal
Hovis Genie can express facial emotions using the head touch sensor, flash, and
eye LEDs. Tact switches located at the palm of each hand can also be used to solicit
response as well. Omni wheels located at the base provides stability and ease of use
by allowing Genie to move in any direction without turning, facilitate automatic
charging, and makes it possible for Genie to be used for educational purposes.
Obstacle detection sensors located near the omni wheel enables Genie to avoid
obstacles while moving. Hovis Genie is available as a kit or preassembled unit. Just
like Hovis Lite, kit format is for educational purposeses where each owner would
learn to assemble and program the robot. Preassembled unit which could also be
used for educational purposes does not involve any assembly or programming and
comes ready to be used at home simply by running the installed Apps. Assembly
instructions for the kit format can be found at archives section of our website
dongburobot.com or downloaded from www.hovis.co.kr/guide .
10
Description:16: public boolean onCreateOptionsMenu(Menu menu) {. 17: getMenuInflater().inflate(R.menu.activity_main, menu);. 18: return true;. 19: }. 20: }. All android Activity are created by inheriting android.app.Acitivity class. Our. MainActivity class was also created by inheriting Activitiy class. When A

