Sunday School Lesson Activity 106 Noah in the Ark PDF
Preview Sunday School Lesson Activity 106 Noah in the Ark
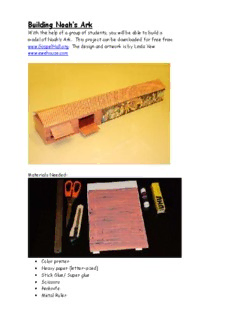
Building Noah’s Ark With the help of a group of students, you will be able to build a model of Noah’s Ark. This project can be downloaded for free from www.GospelHall.org The design and artwork is by Linda Yew www.ewehouse.com Materials Needed: • Color printer • Heavy paper (letter-sized) • Stick Glue/ Super glue • Scissors • Penknife • Metal Ruler Directions: This model of Noah’s Ark is made according to scale 135:1. According to Genesis 6, God told Noah: “14 Make yourself an ark of gopher wood. Make rooms in the ark, and cover it inside and out with pitch. 15 This is how you are to make it: the length of the ark 300 cubits, its breadth 50 cubits, and its height 30 cubits. 16 Make a roof for the ark, and finish it to a cubit above, and set the door of the ark in its side. Make it with lower, second, and third decks.” 1) Print out the cut-outs on letter-sized paper (11”x8.5”). Heavier paper will hold and support weight better. Select only one of the following options to print. • Pages 1 through 13 are the instructions you are reading now. • Pages 14 through 42 are the project pages in color. • Pages 43 through 71 are the printable project pages in black and white which are suitable for students to color or if you don’t wish to use up all your ink cartridges! • Pages 72 through 100 are the black and white pages without the pattern of the boards. 2) Take note of the following symbols as they provide you with the necessary directions on each sheet. Symbol Name Meaning Black/Grey bold line Cut with scissors/ or penknife Black/Grey dashed Fold Or line Dotted line For alignment purpose G Glue Glue or Clear Tape 3) Let’s start with Section 1 Using the symbols as a guide, cut along the bold lines and fold along the dashed lines. To ensure that your lines remain crisp when you fold them, gently score your penknife along the dashed line before you make the fold. You should get something like this for Section 1 Front View: And this for Section 1 Back View Section 1 Interior. This part is a little tricky. Using a penknife, cut along the bold lines that divide the 3 levels. Cut out Section 1 (level 2) and Section 1 (level 3) Slide in Section 1 (level 2) and Section 1 (level 3) and glue down their flaps behind. Do NOT apply glue on the small square sections yet. Glue this interior into Section 1. You should get the following after having completed Section 1. 4) Section 2 Using the symbols as a guide, you should get something like this for Section 2 Front View. Repeat the steps for Section 2 Back View. Glue on the interior of Section 2. You should get something like this: 5) Section 3 Repeat the steps for Section 3 Front View. You should get this: Repeat the steps for Section 3 back view. Cut out a wall for Section 3. Glue the respective sides and slide it into the middle of Section 3 as shown. Next, cut out Section 3 (left partition), apply glue and slide it into the left-hand section. Align with the grey dotted line as shown. 6) Section 4 Repeat all steps and cut out another wall to use as a support. You should get this: 7) Section 4-6 Repeat all the steps till you reach the final section. 8) Connect all sections together Align the slits and slot them in. This step takes some patience as it can be a little challenging.
Description: